Uncategorized
How Orchids Are Produced Through Tissue Culture

Feb
Key Takeaway
Orchid tissue culture is a laboratory-based propagation method that produces genetically identical, disease-free plants from a tiny piece of parent tissue. This guide walks through the full process, from explant selection and sterile culture initiation to multiplication, rooting, and greenhouse acclimatization.
Table Of Content
- What Is Orchid Tissue Culture?
- Benefits of Orchid Tissue Culture
- Why Tissue Culture Is Used for Orchids
- How Is Orchid Tissue Culture Done?
- Criteria for Successful Orchid Tissue Culture
- Common Challenges in Orchid Tissue Culture
- Partner with BB Orchids for Quality Tissue-Cultured Plants
Have you ever wondered why every Dendrobium orchid at a nursery looks the same? Same height, same leaf count, same bloom potential. It’s not luck. That’s the result of orchid tissue culture, a lab-based propagation technique that has changed the way the orchid industry operates.
But how is orchid tissue culture done? And why does it matter for growers, nurseries, and even hobbyists who want consistent, high-quality plants?
We’ve been running our own tissue culture laboratory at BB Orchids for years, so let’s break it down.
What Is Orchid Tissue Culture?
Plant tissue culture, sometimes called micropropagation, is the process of growing new plants from a small piece of existing plant tissue inside a sterile, controlled environment. For orchids, this means taking a tiny section of meristematic tissue (the actively dividing cells found in shoot tips or buds) and placing it onto nutrient-rich media in a flask or test tube.
Benefits of Orchid Tissue Culture
With conventional methods like division or back-bulb propagation, you’re limited by the physical size of the mother plant. You might get 3–5 new plants per year from a single Cattleya division.
Meanwhile, with tissue culture, that same genetic material can produce hundreds, even thousands, of identical plantlets in the same timeframe.
The orchid plants that come out of the process are:
- Genetically uniform: The plantlets are clones of the parent. Every plant in a batch shares the same genetics, so flower colour, stem height, and bloom timing are consistent.
- Free from infections: The process starts with clean, sterilized tissue.
- Faster turnaround: From explant to flask-ready plantlet takes roughly 8–12 months, depending on the species. Traditional seed propagation for orchids? That can take 3–5 years to reach the same stage.
- Better survival rates: Disease-free starter plants have stronger immune systems and adapt faster once potted.
- Commercial scalability: Once a culture is established, it can keep producing new shoots indefinitely (with proper subculturing). This makes it possible to fulfil large wholesale orders, thousands of plants per variety, with consistent delivery schedules.
Why Tissue Culture Is Used for Orchids
Orchids are slow growers by nature. For example, a Dendrobium seed is microscopic. It doesn’t even contain its own nutrient supply the way a bean or sunflower seed does.
In the wild, orchid seeds rely on a symbiotic relationship with mycorrhizal fungi just to germinate. That makes natural propagation unpredictable and slow.
Tissue culture sidesteps all of that. Here’s why orchid plant tissue culture in Thailand has become the standard:
- Faster scaling: A single explant can multiply into 20–50 new shoots in one subculture cycle (roughly 6–8 weeks). This could mean thousands of plantlets from just one starting piece.
- Disease elimination: The sterilization process at the initiation stage kills off bacteria, fungi, and viruses that might be lurking in the parent plant, resulting in cleaner stock.
- Year-round production: Unlike field propagation, which depends on seasonal growth cycles, tissue culture happens inside climate-controlled labs.
How Is Orchid Tissue Culture Done?
The process involves five main stages, each with its own set of requirements and potential pitfalls:
1. Explant Selection and Preparation
Everything starts with choosing the right piece of tissue from the parent plant.
At BB Orchids, we typically use meristematic tissue, specifically the growth points found at shoot tips, axillary buds, or the base of new growths. These cells are actively dividing, which gives them the best chance of responding to culture conditions.
Before anything else, the explant goes through rigorous sterilization. This usually involves a series of washes: ethanol, sodium hypochlorite solution, and multiple rinses with sterile distilled water. The goal is to eliminate every microbe on the tissue surface without damaging the living cells underneath. It sounds simple, but getting this step wrong means contamination down the line.
2. Initiation of Culture
Once sterilized, the explant is placed onto a prepared nutrient medium inside a sterile container, usually a glass flask or jar. This happens inside a laminar flow hood, which blows filtered air across the workspace to prevent airborne contaminants from landing on the media or tissue.
The nutrient medium is a gel-like substance (typically agar-based) containing a precise mix of macro- and micronutrients, sugars (usually sucrose), vitamins, and plant growth regulators. Getting the formulation right is imperative. Too much of one hormone and you’ll get uncontrolled callus growth. Too little and nothing happens at all.
The explant either responds, showing signs of swelling, greening, or initial shoot formation within 2–4 weeks, or it doesn’t. Failed initiations happen, and when they do, you go back to step one with fresh material.
3. Multiplication Stage
If initiation is successful, the explant begins forming new shoots or a mass of undifferentiated cells called callus. The technician transfers these growing tissues to fresh media at regular intervals, typically every 4–8 weeks, to keep the multiplication going.
The growths are introduced to plant growth regulators like Cytokinins to promote shoot multiplication and auxins to influence root and callus development.
The ratio between these two hormone types determines whether the culture produces more shoots, more roots, or more callus. It’s a balancing act that requires experience to get right, and the optimal ratios differ between orchid genera.
A healthy multiplication culture can double or triple its shoot count with each subculture cycle. Over 3–4 rounds, a single explant can yield hundreds of individual shoots ready for the next stage.
4. Root Induction
Once enough shoots have been produced, they’re transferred to a rooting medium, a different formulation with a higher auxin-to-cytokinin ratio that encourages root development.
Healthy root formation usually takes 4–6 weeks. You’re looking for white, firm roots that are at least 1–2 cm long before the plantlets are ready to leave the flask. Weak or sparse rooting at this stage means poor survival later on.
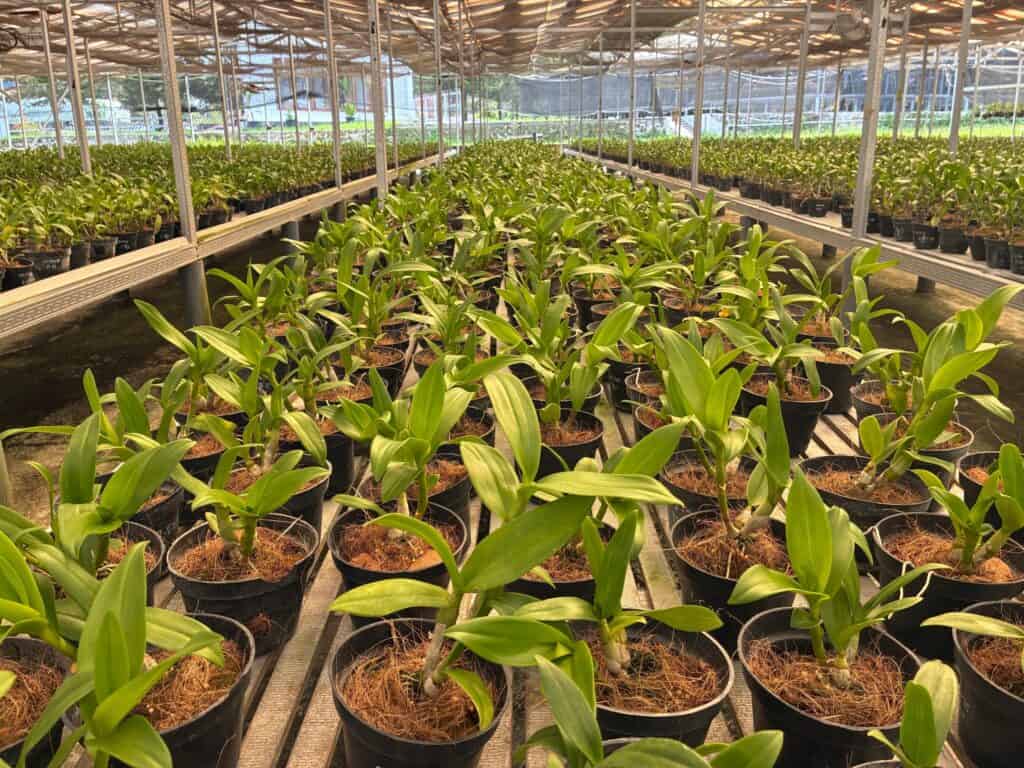
5. Acclimatization and Transfer
Acclimatization (sometimes called “hardening off”) to greenhouse conditions happens gradually. Plantlets are removed from their flasks, gently washed to remove residual agar from the roots, and transferred to community trays filled with a sterile potting mix, which consists of fine bark, sphagnum moss, or a mix of both. They’re kept under shade cloth with high humidity (80–90%) for the first few weeks, then slowly exposed to more light and lower humidity over 4–8 weeks.
Losses during acclimatization range from 5–20% even in well-managed operations.
Criteria for Successful Orchid Tissue Culture
The success of orchid tissue culture depends on several conditions:
- Sterile workspace: A laminar flow hood provides filtered airflow across the work surface, preventing airborne contaminants from reaching the media or tissue during transfers.
- Growth chambers or culture rooms: Maintain consistent temperature and lighting for flasks throughout every stage of development.
- Autoclaving all media at 121°C (250°F) for 15–20 minutes: Done to sterilize media, tools, and containers before any culture work begins.
- Flame-sterilizing tools between each transfer: Prevents cross-contamination from one flask to the next.
- Wearing gloves and lab coats at all times: Reduces the risk of introducing bacteria or fungi from skin and clothing.
- Keeping the lab under positive air pressure: Blocks outside contaminants from entering the workspace.
- Culture media formulation: Typically includes Murashige and Skoog (MS) basal salts (or a modified version), 20–30 g/L sucrose, 6–8 g/L agar for gelling, B-vitamins, and carefully measured plant growth regulators. Some labs add activated charcoal to absorb inhibitory compounds or coconut water as a natural cytokinin-rich supplement.
Common Challenges in Orchid Tissue Culture
Tissue culture isn’t foolproof. Even experienced labs deal with these recurring issues:
Contamination
Fungal and bacterial contamination can appear at any stage: during initiation, after a transfer, or even months into a multiplication cycle if aseptic technique slips for a moment. One contaminated flask placed back on a shelf can spread to neighbouring cultures through airborne spores.
Media Formulation
The difference between a successful culture and a failed one can come down to a fraction of a milligram of growth regulator. And what works for one orchid clone may not work for another, even within the same species.
Lack of Skilled Technicians
Tissue culture work demands patience, steady hands, and an understanding of plant biology at a cellular level.
High Setup Costs
A properly equipped tissue culture lab (laminar flow hoods, autoclaves, growth chambers, and a clean room) requires a substantial upfront investment. That’s part of why many smaller nurseries prefer to buy flask-stage or seedling-stage plants from established labs rather than running their own.
Partner with BB Orchids for Quality Tissue-Cultured Plants
BB Orchids is Thailand’s leading orchid farm, carrying out large-scale orchid plant tissue culture in Thailand for our customers in Asia and across the globe. Our farms, Pramote Orchid Farm (POF) in Nakhon Pathom and Samut Sakhon, have the advanced facilities required for mericlone production, seed culturing, and hybrid testing. We specialize in Dendrobiums, Cattleyas, and Phalaenopsis varieties, providing orchids at every stage.
Trusted by orchid breeders, wholesale nurseries, and businesses worldwide, we pride ourselves on:
- Premium, export-grade orchid plants
- Carefully selected and developed hybrids
- Customized support for small to large orders
- Friendly, responsive customer service
We understand that quality plants from a trusted source make all the difference. And that’s exactly what we do at BB Orchids: grow exceptional orchids backed by nearly 30 years of hands-on experience and in-house laboratory capability.
Contact us to order and we’ll support your business with high-quality orchid varieties and professional advice.
References:
- How Are Orchids Propagated?. Retrieved on 20 February 2026 from https://www.aos.org/orchids/additional-resources/how-are-orchids-propagated.aspx
- Orchid Breeding and Hybridizing: Propagation. Retrieved on 20 February 2026 from https://www.aos.org/orchids/orchid-breeding-and-hybridizing/propagation
- How to Propagate Orchids Using Tissue Culture Methods. Retrieved on 20 February 2026 from https://plantcelltechnology.com/blogs/blog/blog-how-to-propagate-orchids-using-tissue-culture-method s
- PhytoTech Labs. Orchid Tissue Culture Media Selection Guide. Retrieved on 20 February 2026 from https://phytotechlab.com/pub/media/documents/ProductLiterature/OrchidMediaSelectionGuide2023.pdf
- Tissue Culture Technology. Retrieved on 20 February 2026 from https://www.isaaa.org/resources/publications/pocketk/14/default.asp
- Orchid Micropropagation: What It Is, How to Do It, Methods & Challenges. Retrieved on 20 February 2026 from https://saveplants.org/video/orchid-micropropagation/
Frequently Asked Questions About Orchid Tissue Culture
Orchid tissue culture is a lab-based propagation method where a small piece of plant tissue (usually from a shoot tip or bud) is grown on sterile nutrient media to produce genetically identical plantlets. The process of orchid tissue culture involves sterilizing the tissue, placing it on agar-based media with growth hormones, multiplying the shoots through several subculture cycles, inducing root growth, and then acclimatizing the plantlets to greenhouse conditions.
From initial explant to flask-ready plantlet, the process typically takes 8–12 months. This includes 2–4 weeks for culture initiation, 3–4 multiplication cycles of 4–8 weeks each, 4–6 weeks for root induction, and another 4–8 weeks for greenhouse acclimatization. The total timeline varies by orchid species and lab conditions.
Thailand has decades of accumulated expertise in orchid cultivation and tissue culture technology. The country’s tropical climate provides ideal conditions for acclimatizing lab-grown plantlets to greenhouse environments. Thai orchid farms like BB Orchids operate in-house laboratories for mericlone production and seed culturing, giving them full control over plant quality from flask to blooming size.
Yes. BB Orchids supplies tissue-cultured orchid plants at various stages, from flask-stage plantlets to seedlings and blooming-size plants. We specialize in Dendrobiums, Cattleyas, Phalaenopsis, and other varieties grown at our Pramote Orchid Farm facilities. Contact our team to discuss your requirements for wholesale, retail, or individual orders.